


How to Make a Wrist Corsage with Floral Adhesive: A Step-by-Step Guide
Updated: 4 hours ago

Corsages may be small, but there is a lot happening behind those few inches of flowers.
From choosing fresh blooms that will hold up well to creating a secure base that stays comfortable on the wrist, every little detail matters.
At Tognoli Florist, we make our wrist corsages using fresh flowers, ribbon, greenery, decorative accents, and floral adhesive rather than wiring every individual bloom.
It is a method we love because it allows us to create soft, garden-style corsages while keeping the mechanics compact and comfortable to wear.
If you have ever wondered how a florist puts one together, here is a look behind the scenes.
What You’ll Need
For this corsage, we used:
A slap bracelet corsage base, sometimes called a slaplet
Ribbon
Tulle
Fresh spray roses
Small filler flowers
Greenery
Decorative floral accents or rhinestones
Floral adhesive
Floral snips or scissors
The exact flowers and colors can change depending on the occasion. Prom, homecoming, weddings, and other special events are all opportunities to customize the design around an outfit or color palette.

Step 1: Create the Corsage Base
We begin with the slap bracelet.
First, we attach tulle and ribbon to the plastic platform of the bracelet to create a soft base for the flowers. We also secure the plastic piece to the bracelet itself so it does not slide around while the corsage is being worn.
The ribbon is not just decorative—it also becomes part of the structure of the design.
slaplet corsage bracelet tulle ribbon bow slaplet ready for flowers
Step 2: Apply the Floral Adhesive

For this style of corsage, we use floral adhesive throughout the design.
One of the most important things we have learned when working with floral glue is that more is not better. A small amount is usually enough.
We apply the adhesive and allow it to become slightly tacky before placing the flowers. This gives us more control and helps create a secure bond without excess adhesive spreading through the design.
Fresh floral adhesive may look fairly liquid when first applied. After a few moments, it becomes tackier—that is when we begin attaching the flowers.
We always use Oasis Floral Adhesive, it is a cold glue specifically designed for flowers.
Step 3: Start With the Main Flowers
Next come the spray roses.
We trim the stems very short and begin placing the flowers around the base in an alternating 'X' pattern, allowing each bloom to face slightly outward.
Rather than placing all the flowers in one straight row, we stagger them. This creates a fuller, more natural shape and allows the corsage to look beautiful from several angles.
spray rose with stem trimmed short for corsage roses in X pattern
Step 4: Fill the Gaps
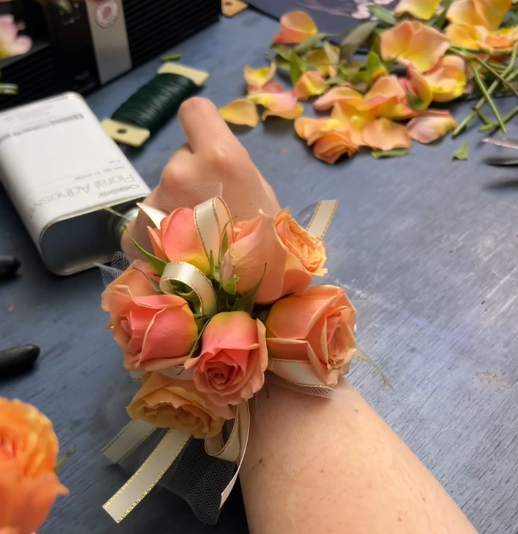
Once the first flowers are in place, we add a second layer wherever the design needs more fullness.
This is where the corsage really begins to take shape.
Small gaps are useful—they give us places to tuck in additional blooms without making the arrangement feel crowded. We continue working around the bracelet, checking the corsage from different angles as we go.
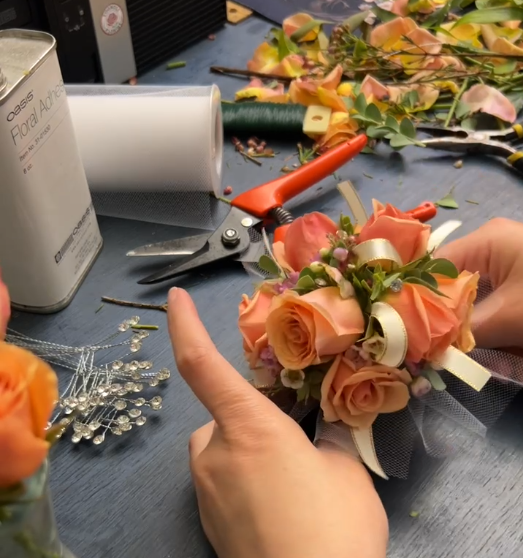
Step 5: Add Filler Flowers and Greenery
After the roses are secure, we add the smaller details.
Filler flowers bring texture and help soften the spaces between the larger blooms, while small pieces of greenery give the arrangement movement and contrast.
These are often the details that make a corsage feel finished rather than simply looking like several flowers attached to a bracelet.
adding fillers adding greenery
Step 6: Add a Little Sparkle

This step is optional—but we love it for prom and other special occasions.
A few rhinestones, pearls, delicate decorative sprays, or other accents can tie the corsage into jewelry, dress details, or the overall look of the event.
The trick is not to overdo it. The flowers should still be the star.
Step 7: Let the Adhesive Fully Set
Once everything is in place, the corsage needs time for the floral adhesive to fully set before it is handled extensively or worn.
This part is easy to underestimate.
The adhesive becomes tacky quickly, but allowing the completed piece enough time to cure helps all those little connections become much stronger.
We have actually tested one of our finished corsages by taking it completely apart afterward. It took nearly ten minutes of pulling, twisting, and removing flowers before we finally got everything off—the flowers gave up before the adhesive did!
Do Corsages Have to Be Wired and Taped?
Not necessarily.
Wiring and taping is a traditional corsage-making technique and is still used by many florists. Floral adhesive gives us another option.
Different flowers, designs, and florists may call for different mechanics. For this particular style, we prefer keeping the stems very short and securing the blooms close to the base with floral adhesive.
The important part is not whether a corsage was made with one specific technique. It is whether the finished piece is secure, comfortable to wear, and appropriate for the flowers being used.
Fresh Flowers Matter
Mechanics are only part of the equation.
We begin with fresh, properly hydrated flowers and keep the stems short so there is very little weight pulling against the bloom.
That is especially important in a wrist corsage, which will spend hours moving around while someone dances, hugs friends, takes pictures, and enjoys the event.
Once finished, corsages should also be stored properly until they are ready to be worn.
Make It Your Own
One of our favorite things about corsages is how customizable they can be.
Roses are a classic choice, but the colors, fillers, ribbon, greenery, and decorative details can all be adjusted to create something completely different.
Some people prefer a delicate, minimal corsage. Others love a fuller garden-style design with several flowers and plenty of texture.
There really is no single “correct” look—the best corsage is one that feels right for the person wearing it.
matching yellow corsage and boutonniere matching white corsage and boutonniere red corsage pink cymbidium corsage matching peach and black corsage and boutonniere matching pink and black corsage and boutonniere
Prefer to Skip the DIY?
Making your own corsage can be fun, especially if you enjoy working with flowers.
But if glue, ribbon, and tiny flower stems are not how you want to spend the afternoon before your event, we are also very happy to make one for you 😊
At Tognoli Florist, we create fresh corsages and boutonnieres for proms, homecomings, weddings, graduations, and other special occasions, with local flower delivery and pickup options for customers throughout Gaithersburg and surrounding Montgomery County areas.
Sometimes DIY is fun.
And sometimes… it is nice to just call your local florist 🌸✨


Comments